If you’re on the Invisalign journey, you know that keeping those trays pristine is a top priority. It can feel like a daunting task, especially when you’re just starting out.
I’m here to share my tried-and-true Invisalign cleaning routine with you today!
Hi, my name is Sarah and I completed my Invisalign journey in 75 weeks!
This blog documents my own personal experience with wearing Invisalign aligners - all the ups and the downs.
This blog does not constitute medical advice, so speak to a dental professional about any specific concerns.
From the moment you pop those trays out to the satisfying click when they’re back in place, I’ve got you covered.
Step 1: Remove Aligners
The easy part – remove the trays.
One of the hardest parts at the start of your Invisalign journey is having to take the trays in and out.
At first, it feels like you’re pulling your teeth out of your mouth!
I always use a PulTool or Orthokey to remove my trays, as it saves my nails and it’s much more hygienic.

Step 2: Soak Aligners in Cleaning Solution
I have a rule: never let my aligners dry (if I can help it).
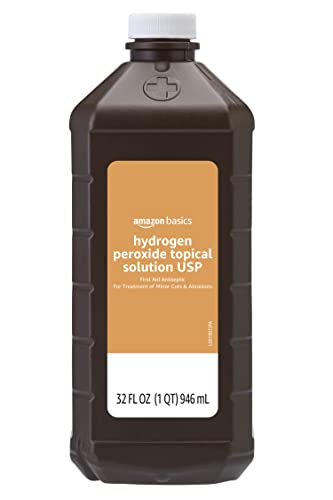
I take them out of my mouth and put them straight into a cleaning solution which is either:
- Hydrogen peroxide and water
- Retainer cleaning tablet and water
I never use the Invisalign cleaning crystals, as they taste terrible, even after extensive rinsing!


Step 3: Eat & Drink All The Things!
As there’s only a 2-4 hour window each day when I’m allowed to keep my aligners out, it’s time to multitask!
While my aligners are soaking in their cleaning solution, it’s time for me to eat and drink things besides water!
I don’t rush my meals, I take my time to enjoy my food and still manage to wear my aligners for 20+ hour each day.
Step 4: Wait 30 Minutes
After eating, I always wait 30 minutes before going to brush my teeth and put my trays back in.
Why?
Because most food in our diets is acidic.
Dietary acid softens our tooth enamel, but our saliva naturally takes care of that and our enamel hardens up over time.
Dentists recommend waiting at least 30 minutes1 after eating or drinking acidic food before brushing your teeth, so that you’re not brushing your teeth in their softened state.
I usually try to drink a glass of water during this time, to help flush any food particles away from my teeth after eating.
Even doing this, I’m still able to wear my aligners for 20+ per day, as eating usually only takes about 15-20 minutes.
That, plus 30 minutes of waiting means that I remove my aligners for 50 minutes 2-3 times per day.
Step 5: Put Aligners in Ultra Sonic Cleaning Pod
Now here’s the high tech part!
I put the aligners (with their cleaning solution) inside an ultrasonic cleaning pod, which vibrates thousands of times per second to dislodge particles of dirt and microscopic bacteria.
This cycle usually takes about 5 minutes.
If I feel the need to, sometimes I’ll run the pod a second time with just clear water to really get rid of all the germs!
The water inside an ultrasonic cleaning pod can get warm. It shouldn’t be steaming hot, but if you run it multiple times, be sure to change the water in between each cycle to ensure it doesn’t get too hot an damage your trays.
Many people will tell you this is a luxury – not an essential – but I wholeheartedly disagree.
Instead of having to scrub your trays every day with a brush – why not drop them inside an ultrasonic cleaning pod and let that do the hard work instead!?
Seriously – a game changer.

Step 6: Use A Water Flosser for 2 Minutes
Next, I fill my water flosser’s reservoir with lukewarm water and move the tip along my gum line, pausing for a few seconds between each tooth.
The high pressure stream of water dislodges any food particles, plaque and bacteria hiding between the teeth.
It also feels like a pressure washer for your gums – and I’m here for that!
It’s like a massage for your teeth and gums, definitely worth the investment if you don’t get have one.


Step 7: Use Regular Floss/Inter-Proxy Brushes on All Teeth
Even though I use the water flosser, I don’t reject regular floss.
When I use standard floss, I still notice some soft plaque and food particles being removed – from certain teeth in particular, even after water flossing.
So, for now, until my teeth straighten up some more and become less crowded as my Invisalign treatment progresses (or until my water flossing technique improves) – I’ll keep regular floss in my routine.
Sometimes, I also use inter-proxy or inter-dental brushes, but these are made of plastic and don’t last very long, so I try to buy regular floss as it’s more economical.
Step 8: Rinse With Alcohol-Free Mouthwash for 1 Minute
The next part of my Invisalign cleaning routine is mouthwash!
I like using alcohol-free mouthwashes, as alcohol dries my mouth out so that is becomes uncomfortable, especially while wearing aligners.
Clear mouthwash with no artificial dyes and a fresh, mild mint flavour is also important to me.
I usually just hold it in my mouth for a minute or so, and swish it around.
I don’t gargle it, because I can’t (I’ve tried!)
Step 9: Brush my Teeth With An Electric Toothbrush for 2 Minutes
Now it’s time to brush those teeth!
I use a regular electric toothbrush for 2 minutes, with a timer.
I brush each arch for 1 minute before moving onto the next.
You don’t need a lesson from me about brushing your teeth! But I try my best to be thorough and reach all the surfaces of every tooth.
I don’t use whitening toothpaste as it’s abrasive2 and makes my teeth sensitive, but I do use a toothpaste with Fluoride twice a day to keep my teeth strong 💪🏻
Step 10: Gently Brush My Tongue
Your tongue is a bit like a carpet, it absorbs eveything.
I gentle brush my tongue with a manual soft bristled toothbrush from the back to the front a few times, then spit.


Step 11: Rinse Aligners Thoroughly
Before putting my aligners back in, it’s important to thoroughly rinse the trays with cold or lukewarm water to remove any residue of the cleaning tablet or solution.
I usually rinse each tray for about 30 seconds under the running water and I don’t bother drying them before putting them back in.
Step 12: Put Aligners Back In & Use A Chewie for 5 Minutes
Finally – the last part in this comprehensive Invisalign cleaning routine – the trays go back in my mouth!
If the tray is fairly new or I feel like it’s not fitting well, I use a chewie.
Chewies (sometimes called munchies) are spongey pieces of silicone for you to chew on to help your aligners seat properly3.
This will help ensure the tray is fitting tightly around my teeth so it can get to work!
There are cylinder shaped chewies and Y-shaped chewies.

Both work in exactly the same way.
Baby teething rings also work well for this purpose (just make sure you’re sterilizing them first!)
See also: 18 Things they don’t tell you about Invisalign
Invisalign Cleaning Routine: Summary
And there you have it, a comprehensive Invisalign cleaning routine that’s been my trusty sidekick throughout this transformative journey.
Remember, consistency is key, and with these steps, you’re not just ensuring clean aligners but also a healthier, brighter smile.
There’s no point having perfectly straight teeth if they’re filled with cavities!
So, keep up with the routine, flash those pearly whites with confidence, and let your Invisalign journey be as smooth and gleaming as your soon-to-be-perfect teeth.
Until next time, keep smiling and shining!
Footnotes
- https://www.cuimc.columbia.edu/news/brushing-immediately-after-meals-you-may-want-wait#:~:text=Brushing%20immediately%20after%20consuming%20something,and%20build%20itself%20back%20up. ↩︎
- https://www.colgate.com/en-us/oral-health/selecting-dental-products/the-facts-about-abrasive-toothpaste#:~:text=Even%20for%20non%2Dsmokers%2C%20toothpaste,the%20ADA’s%20Seal%20of%20Acceptance. ↩︎
- https://www.healthline.com/health/dental-and-oral-health/invisalign-chewies ↩︎